Posts by Al Billings

Weird Records from 3D Printers and Laser Cutters

Al Billings

Warning: This post is rather heavy with the use of Flash to show videos. Sorry!

I’ve seen a bit of weirdness involving records, of all things, lately. Records, specifically Vinyl Records, are a pretty obsolete technology at this point. Yes, I’m well aware of the undying love for the “superior” sound quality of vinyl from a certain subset of bibliophiles. These people adore their record collections until the end of time. The rest of us, like my wife, have long given up on vinyl and moved, first, to compact discts (if not tapes) and then to mp3 files and our iPod-like devices. This moves record technology for most people, especially the young, into the same realm as wind up gramaphones or rotary telephones and HAM radio: old technology loved by a view but looked upon oddly by the rest.

Now, in spite of this (or maybe because of this), people are doing some weird things with record technology right now as artists. I wanted to share a few instances that I have come across, two from the same person. I came upon all of these within the last two weeks so they kind of stuck in my mind.

First, we have ice records. Cue video:

A band, the Shout Out Louds, sent out ten kits to people that have a silicone negative image of a single from their recent (unreleased at the time, I believe) album. This came with instructions to pour enclosed distilled water on it, freeze it for six hours, and pop and ice record from the mold to then play. You can view the results above.

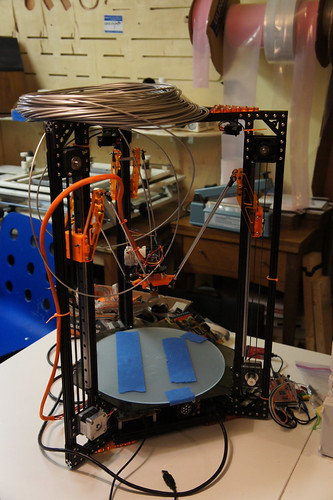
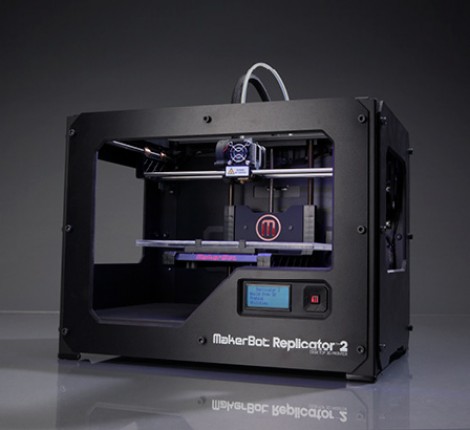
Next is Amanda Ghassaei’s attempts to play with record technology as an artist. First, she used some high end printers to 3D print a record. She details this (at great length) on a post on instructables on this. She figured out a method to convert an mp3 music file into a grooved shape thaat would play on a traditional record player. This was then printed on a high end printer, though I suspect that a well tuned hobbyist printer might work well enough. She mentions that it has a sampling rate of only 11kHz and 5-6bit resolution, which makes it sound a bit like an ancient Edison era recording. The video below gives an example of the result:

Amanda has more recently gone on to try the same trick using a laser cutter, resulting in a wood record etched by the laser. She wrote another instructable describing this process. You can also watch her video about it below to hear the wood one:

She’s actually done this with acrylic using the laser as well and I think that it sounds a bit better than the wood one:

All of that said, the audio on all of these is horrible. I actually think the ice record sounds the best. What I’ve found the most interesting about this is the intersection of an obsolete and very analog technology, the record player and the records, with interesting art and even cutting edge tools like a laser cutter or a 3D printer. Technically, the ice record could have been made 50 years ago (I don’t think making a silcone negative is likely a difficult technical challenge) but this marriage of art and technology is fascinating.

People often ask me, “What do you make with a 3D printer?” The joke, of course, is the answer, “Parts for more 3D printers” (thought it is often true). That said, the ability to quickly prototype, especially to prototype from an artistic vision created within a computer, is really cool for art. Amanda wrote a script in Processing, an open source language used by artists a lot and often used with arduinos, to do the conversions for her to turn the music files into a three dimensional construct that she could then print or cut. What other art do people have locked inside of them that they can use these tools to express?

Continue reading

Visiting Metrix

Al Billings

Last week I was up in my old home of Seattle for a few days to see family and friends (my daughter just turned 17).

While there, I dropped by Metrix Create:Space on and off as I was staying a 10 minute walk away and the owner, Matt, is a friend of mine. I talk to Matt on IRC fairly often and have been monitoring 3D printing developments at Metrix through him and watching their flickr feed. Since I had the time, I came to the weekly 3D printing night to meet folks working on projects at Metrix.

Johann Rocholl has been the primary moving force in the current interest in Delta printers within the reprap community. He has a tumblr with many pictures of his work and maintains a github repo for development. Terence Tam also does a lot of work at Metrix with his OpenBeam aluminum extrusion, which is a 15 mm profie extrusion that is open source and used by a lot of folks for building 3D printers. There is also Mattew Wilson, who has developed the Brainwave all in one printer control board (which is very nice), working out of Metrix.

They have quite a critical mass of people doing fun things with 3D printers and open source.

You can see the “OpenBeam Kossel Pro” that Terence and Matt have been developing:

DSC00704

Johann was also working on his “Mini Kossel” (which also uses OpenBeam), which is his attempt to build a portable Delta printer that can travel easily and maybe even be battery powered:

DSC00723

From talking to folks, I expect that there will be announcements at Maker Faire in Redwood City in a few weeks and Delta printers, among others, will make a heavy appearance there.

It was nice to see folks actively working on printers and advancing the technology associated it.

I haven’t posted much about my printer projects in the last few months as I’ve been making incremental progress. My Rostock Mini is largely stalled out due to lack of desire to deal with some design issues on it (though I may pick it up again soon) but I have a Hadron Ordbot that is completed except for mounting the heated build platform and splicing some wires. I’ve tested all of the electronics and motion but haven’t printed with it yet. The Foldarap has been waiting for the last six weeks or so for me to mount its printing bed and carriage but I hope to have it on the Ace Monster Toys table at Maker Faire in three weeks.

Untitled
current state of my Foldarap

Untitled
my Hadron Ordbot

One thing that I’ve been doing is co-hosting an ongoing 3D printing meetup every other Wednesday night at Ace Monster Toys. People have been showing up to work on printers, discuss issues around them, and generally show off their work. I’m actively working on creating a bill of materials to self-source parts to do a workshop series where 10 people (hopefully) build a Printrbot Jr. clone at AMT. The real issue there is trying to get the cost of the materials as near a $250 price point as possible (and it may not be possible to get below $300 really). Electronics from Printrbot are $129 retail, the hotend is $59, and, realistically, we need four stepper motors for roughly $15 each plus all the screws, rods, etc. It is the combination of the electronics, hotend, and motors that is kind of hard to move without just completely replacing them with someone else’s parts.

Atom Bomb at AMT is actively discussing the development of a new “all in one” 3D controller board with built in stepper controllers that do 1/16 motion. We’re hoping to publish a specification and have PCBs made for this, even if we don’t use this for the 3D printing workshop. The end-goal is to have a solid board with a total cost for the bill of materials around $40, which is half or a third of the common cost for RAMPS and other 3D controllers. I expect we’ll have more news on this in a few weeks or a month.

I’m hoping to have more announcements in the future but all of this means that I’ll probably be assembling a Jr. (or a variant) soon because I’m going to need to know it backwards and forwards to teach a class on it and I may wind up making a bit of a variant later.

Continue reading

Foldarap Adventures

Al Billings

When last I wrote, I said that I was building a Rostock Mini 3D printer. That is still true but I hit a few snags. The creator, who did a lot of cool work making a parameterized design for it, never quite published his extruder design. That means that I’ve been trying to figure out how I was going to get the business end of the printer extruding plastic. I’ve been looking at v3 of the Airtripper Bowden Extruder but had to order a bunch of parts for it. (As an aside, while I do everything in metric to maintain compatibility with the worldwide making community, it is a real pain to get metric screws of all sizes in any number so I have to order them and wait wait wait…) This combined with needing to replace the carbon pieces that I was using for arms meant that I was a little stalled out on the Rostock Mini.

DSCF3339
Foldarap by Emmanuel Gilloz

So, like any dumb hacker, I decided to work on another printer instead. I guess I’ve caught the reprap bug. I decided to make a FoldaRap. Emmanuel Gilloz, a French hacker, came up with his own RepRap design that uses 20 mm extruded aluminum (which is cheap) that can be folded up and put into a padded case. This makes it a both affordable design but one that can easily be taken to hackerspaces, conferences, or other events. Since I’ve had to lug my Up! Plus to Ace Monster Toys three or four times in the foot well of my car, this is a real plus.

DSCF2907
Foldarap in Suitcase by Emmanuel Gilloz

Building this, the most difficult part has been sourcing the materials. Emmanuel is in France and they have a different convenient supply chain in Europe. He published his build of materials but I had to do my best to make some adjustments (and find yet more metric screws). The two biggest issues were the source of the aluminum extrusion and the fact that he used some RepRap Huxley components, including a Huxley hotend.

With the Huxley components, that meant that he used a 140 mm square aluminum heating bed. Since Prusa Mendels are the most common RepRaps that I see here in the US, I either had to order overseas for the bed or cut my own. I actually found an individual making them, removing the necessicity to cut my own plate and then tap it for screw holes for mounting.

Most American builders are using hotends from Makergear or J-Head hotends (which are out of stock for my size plastic except for Chinese copies). I didn’t feel inclined to deal with yet another custom extruder system (see Rostock Mini issues at beginning of post) so I wound up getting the Huxley extruder that Emmanuel recommended, minus a few unnecessary parts.

The extrusion of choice here in the US is MiSumi 2020. It costs $3 for a 300 mm long piece, which means for about $30 plus cheap shipping (in California even), I can have regular, solid aluminum pieces. As a bonus, Misumi will cut to length in half millimeter increments so the pieces arrive ready to go.

All of my materials arrived about a week ago except for my Huxley hotend and my aluminum (with the exception of my control electronics). I used my existing printer to start making pieces per the FoldaRap design and immediately hit a snag: my plastic wouldn’t fit on my extrusion. (No, that isn’t a euphemism.) I asked Emmanuel about it on the RapRap forums and he was very responsive to questions. Initially, it seemed that my Up! wasn’t printing with enough precision to fit the gap between my extrusion but, pulling out my calipers and then looking at Emmanuel’s designs, I found that his design had a 1.5 mm gap where my extrusion was (roughly) 2 mm thick:

Untitled

Untitled

Foldarap gap
not 2 mm!

Luckily for me, open source wins! Emmanuel has the source for the FoldaRap up on github. Like many hackers, he does all of his 3D design in Sketchup (because it is free and easy to use, I assume). I’ve never done much with it but I’ve seen it used at AMT quite a bit by a few of our members. A quick download of it and the github source and I had parts to stare at. I then spent an hour givining myself a crash course in how to alter metric parts in Sketchup, expanding the gap in the above picture by half a millimeter on four pieces that needed to fit with a plastic ‘T’ connector. Exporting it out to STL format, I started a test print and went to dinner with my wife. On returning home, I tried it out and it worked!

Misumi-compatible Foldarap_z-top-left

If Emmanuel wants it, I’ll submit a patch to Github with the Misumi specific changes to the four files. I made a separate sketchup file with just those four pieces in it. That might be my first submitted patch on github if I do so.

I’m now printing out the other three pieces (two of them are three hour prints each) so I can begin the actual process of assembling the FoldaRap over this three day weekend. Given the missing electronics and general slackitude, I don’t expect that I’ll finish it this weekend (hmm…I’m missing my power supply as well, come to think of it) but I do expect progress. I’ll then get back to my pesky Rostock Mini. I expect that the FoldaRap build will go quite a bit more quickly as Emmanuel’s build documentation is quite thorough with both pictures and video of the various stages.

Continue reading

Building a Rostock Mini

Al Billings

I haven’t posted in a while here, largely because I haven’t finished any interesting projects lately. The one thing that I’ve been building recently is a delta printer. This is a slightly different design than the standard for a reprap printer.

Johann, up in Seattle, has been playing with these during the last eight months or so. He published an initial design on Thingiverse, which led to a lot of people getting excited and working on the project. (In fact, there is a very active Google Group for it, right now.)

You can see his original version doing a print below:

For those familiar with reprap printers, this is a very different model for moving the printing head.

Brian Evans in Colorado came up with a variant, called the Rostock Mini (or here. Originally, it was meant to be a more desktop sized version of the Rostock, as they can get quite large. In the process of making it, Brian created an OpenSCAD version of it that is parameterized, so you can create an arbitrarily sized version. It turns out, it isn’t really that desktop sized but it more convenient.

Right now, I have an Up! Plus printer, which is a closed source Chinese printer. It is pretty reliable but you can’t do fairly standard things, within the open source reprap community, like tweaking the slicer settings or temperatures. While I’ve enjoyed using it, I’ve found it frustrating enough that I wanted to build a new reprap printer. Seeing Brian’s design, I decided to start on a Rostock Mini a couple of months ago. It took a while for me to get parts printed, then I had to track down all of the various metric screws, bolts, etc., as well as electronics for it and steppers. If there is a complaint that I have about making reprap printers, it is that by the time you source all of the parts from various places, it winds up being at least 30% more expensive than you expect and you often sit around waiting for a single piece that you’re missing. In fact, at this moment, I’m still waiting to track down pieces for my Bowden extruder, needing just one or two of several screws which are sold in bags of 50 or 100 for $10.

That said, I made significant progress on putting everything together the other day, as you can see below. I printed out most of my plastic components in a colorful purple PLA plastic. I found some cast off pieces of smoking acrylic at Ace Monster Toys (they were corners left over from a larger project) and cut them on our lasercutter, along with some cork for dampening motor vibration. This weekend, I got the basic frame assembled except for the extruder platform and the three carriages where it mounts to the frame.

Untitled

You can see my whole photo set for the build so far over on Flickr.

The next steps are to get the extruder platform built and the hot end mounted, then connecting belts to motors, and mounting electronics. Finally, I’ll have to get the Bowden extruder mounted to it and connected.

I figure it might take me another month to get it built as I’m not in a rush but it looks pretty good so far and I’m looking forward to seeing how well it prints.

Continue reading

OMFG Closed Source 3D Printers

Al Billings

brepettis
Bre Pettis

Wow. I posted about the new Makerbot Industries Replicator 2 yesterday. I’m still, site unseen except for the videos, impressed by the design and taking things to a prosumer level but Bre and MI have apparently confirmed that the software and (it seems?) the hardware are both closed source, at least according to Josef Prusa, and people are having an Internet style freakout.

Since the first Makerbot machine, the Cupcake, and all subsequent ones, were iterations off of designs from the RepRap community. RepRap is pretty much the epitomy of an open source community in both hardware and software. Earlier versions of the Makerbot software, ReplicatorG, just wrapped up existing open source RepRap software components. There has always been some tension between Makerbot Industries as a company selling itself and its ideas to the public (and investors) and the open source roots of their work but they have handled it fairly well until now. Bre and others there have been involved publicly in various open hardware events. MI released their designs for printers to the community, making them available in repositories and on Thingiverse, their site for hosting designs. This has led to quit a few knockoffs and a few outright clones, such as the Tangibot that had a failed kickstarter and was simply a direct, Chinese manufactured, clone of the existing MI Replicator. People have wondered if MI was going to continue to be an open source company in the face of threats like Tangibot, especially with having taken VC money in the last year.

Because of this history and the reactions of many open source folks to commercialization of FOSS work, people often seem to have an ambivalent relationship to Makerbot Industries. I’ve been one of them, having felt burned by the way they abandoned support of existing product lines almost immediately on shipping new versions, which is not what you expect from a commercial company with customers. At my hackerspace, this has made us unwilling to rely on MI for our printers, causing us to look at and use various alternatives (and to not replace our aging Cupcakes with newer MI designs).

Today, the shitstorm has landed (more of a shitnami as I write this). Josef Prusa, of “Prusa Mendel” fame, claims that he’s called MI and exchanged email with Bre Pettis and that it is confirmed that the new Replicator 2 and Makerware, their new software, are closed source. I’m not sure if this understanding is actually true or if it is that the software is closed source (it has a spiffy giant EULA) with open source components and the Replicator 2 reference designs will be open sourced once they’ve actually shipping in a month or two. The latter is what they did with previous designs, not making them available until after they ship. Regardless of the final picture on this, the RepRep and 3D printing community is freaking out today.

The comment thread on Josef’s post is pretty epic (and his “Occupy Thingiverse” post on Thingiverse.com) and now there are a series of Google+ proclamations and responses (see 1, 2, and 3) as people start freaking out about the not-very-recently-changed Thingiverse EULA since Thingiverse is operated by MI. Josef’s post and the controversy have also made Slashdot and Reddit today with people making various proposals for moving the hosting of designs off of Thingiverse.

This ought to get interesting but I do hope people calm down. Even if MI and Bre have decided to go closed source, it doesn’t necessarily really affect the RepRap (or larger 3D printing community), given that 3D printing has been dominated by fairly large, closed source, corporate entities for decades. People can continue to iterate on designs and improve things. Personally, as much as I wish that it was open source, having an affordable (under $3,000) 3D printer that is reliable and usable by non-geeks will raise the bar for the larger community. It gives people a target to beat and to do so with open source. I do think people are up to the challenge and I look forward to seeing their work.

Update: Bre has posted an official reponse to the kerfuffle.

Continue reading

New Makerbot Printer

Al Billings

Wow, today is an unexpected news day for 3D printing. Over at Ace Monster Toys, we’ve had a number of 3D printers, either in the space (Makerbot Cupcakes, part of a Prusa Mendel, and a Printrbot LC) but have always found them a bit of a pain in the ass, frankly. By and large, they haven’t lived up to the hype, mostly because of maintenance issues which make them a bit unreliable for the kind of day in and day out printing by random folks that you expect to have in a hackerspace.

We’ve been talking about getting an Up printer for a while. The downside of the Up printer is that it isn’t open source. It is a Chinese made printer using the ideas from the RepRap community but using closed source software. It isn’t a tinkerer’s device. A lot of people who have 3D printers have them as a project in and of themselves, which makes them fun to work on (I guess). If you just want to make a 3D file and print it, you’re less interested in the printer as its own project and just having it work. By a number of accounts of friends at professional prototyping shops and research groups, the Up just works. It feels bad since it betrays the open source ethos.

Because of all of this, we’ve gone back and forth on this. I still expect that we’re likely to get an Up at AMT, based on price and reliability. The wrinkle today is that Makerbot Industries, who was the first company to really comercialize RepRap hobbyist technology has finally created a printer that they consider a “prosumer” device, the Replicator 2. They announced it today in a live press event and their website has now been updated to reflect the new products.

My issues in the past with Makerbot Industries is that they tend to orphan users of their devices and have an annual or less update cycle. So, if you buy your new shiny printer kit from them, build it and are working with it, Makerbot Industries tends to end support a few months after you bought it in order to suddenly unveil their new printer. They don’t do legacy support, except within the community (not their staff), which really sucks. When I owned one of their Cupcake printers, I felt really burned by this. I know, for example, that Hacker Dojo in Mountain View just ordered a Replicator printer, which was the new hotness less than six months ago at Maker Faire, just a week or so ago. Suddenly, their printer is now old news and probably won’t be supported in six months.

So, this is the downside of a quickly iterating hardware startup.

The upside of quick iteration is that the state of the art seems to really improve quickly, which is the case today. The Replicator 2. It has a 0.1 mm layer height on the parts it prints out, which is damn good out of the box. I’ve seen other printers do this or better but not without a massive amount of tweaking and playing with them. This printer has gone from ye olde lasercut plywood, the standard for almost all, to a metal framed, factory assembled printer.

makerbot-rep2

Features that they are listing are:

  • 1.2 L x 6.1 W x 6 H in(12.75 in diagonal) buid area (which is huge)
  • 100-micron layer resolution
  • Wear-resistant, oil-infused bronze bearings
  • Black powder-coated steel frame
  • Optimized for PLA (which is a nicer material in the long run)
  • New software (Makerware) which seems to be compiled code and optimized for use by normal humans (downside is that they are using a new file format…)

I’m actually excited by this device, which is unusual for my jaded self at this point. My main, personal, goal with a 3D printer is to design and print cool things. I’m actually quite tired of the ongoing “build and maintain a 3D printer from scratch or a kit” type projects. I just want to print stuff. This new Replicator 2, along with the current Up Plus and the upcoming Up Mini, is one of the few things out there to fulfill this goal.

The one downside is that Makerbot Industries’ prices keep going up. The Cupcake was something like $900 or $1,000 as a kit and the common price point is from there to about $1,400. This new device is $2,200, basically. That isn’t cheap, which means people really need to think about whether they want or need this device. It is definitely worth considering though.

Update: I see Wired magazine has a big piece up now. Make Magazine has a mini review up as well.

Continue reading

Making Clocks

Al Billings

Today, a batch of Ardunino compatible nixie tub boards arrived from China. I heard about these a week ago on Professor Craven’s blog and immediately ordered four of them for myself. For those that don’t know what a Nixie Tube is, Wikipedia has the answers. As it says:

A Nixie tube is an electronic device for displaying numerals or other information. The glass tube contains a wire-mesh anode and multiple cathodes, shaped like numerals or other symbols. Applying power to one cathode surrounds it with an orange glow discharge. The tube is filled with a gas at low pressure, usually mostly neon and often a little mercury or argon, in a Penning mixture.

Basically, Nixie tubes were used before LED displays were invented to do alphanumeric displays on equipment, especially in the various militaries of the world. The numeric only ones, such as what people use for clocks, have the numbers 0 through 9 individually outlined, one on top of the other, with each one lit in turn as needed. If you’ve watched old 1960s science fiction movies, you’ve undoubtedly seen a Nixie tub display on a computer or piece of “high tech” equipment.

Professor Craven put a little video up yesterday of his tubes plugged into a board:

I have a flickr photo set of one of the boards as received.

Like Professor Craven, I plan on using them for a clock of sorts. More specifically, I plan on making a meditation timer for shits and grins. The idea is that I will laser cut a box at Ace Monster Toys to hold the hardware. I’ll put an arduino and the Nixie tube boards in it, with two or more of the tubes poking out, as a display. I’ll probably use two to signify minutes. I’m then thinking of adding two solenoids that go out the sides, underneath to small metal bars or rods and a few buttons. The idea is that you can set a series of times on the clock, like a sitting period and then a walking period for meditation (or a series of these as pairs) via the buttons. When each period ends, the solenoids will fire a series of times (like two or three or one, depending on what just ended or if we’re completely done), which will strike the metal bars, triggering a chime.

This is similar to the “Zen Alarm Clock” that has been around forever but a bit less new agey and more…something.

This seems both appropriately hackerish or geeky and appropriately Buddhist, in some sense.

Continue reading